
User guide
From the first install to a full recording session.
What you need
Akemix does not ask for studio gear: it asks for a network that holds.
The PC always goes on cable. That is the rule with no exception: if the server competes for the air too, the whole mix inherits the network jitter.
Building a stable network
Audio travels over UDP: it arrives fast, but it is never resent. A lost packet is a gap you can hear. That is why the network is prepared before the first session, and not when people are already waiting.
A router dedicated to Akemix is ideal: it does not need to be expensive, it needs to be free. Nobody downloading or streaming video on the same band.
- 01Connect the PC to the router with the UTP cable and turn its WiFi off, so it cannot switch routes mid-session.
- 02Put every phone on the same band and the same access point as the PC. No repeaters or mesh: each hop adds jitter.
- 03Turn off WiFi power saving on each phone. It is the most common cause of periodic gaps.
- 04Keep the phones charging or well above empty: Android power saving throttles the radio on its own.
- 05With everyone connected, check the bottom bar before you start. Steady latency and gaps at zero is the green light.
First steps
Unzip the package wherever you like and run Akemix. Allow network access when Windows asks: the server needs permission on private networks to receive the audio packets. On start, the console opens by itself in your browser.
Connecting devices
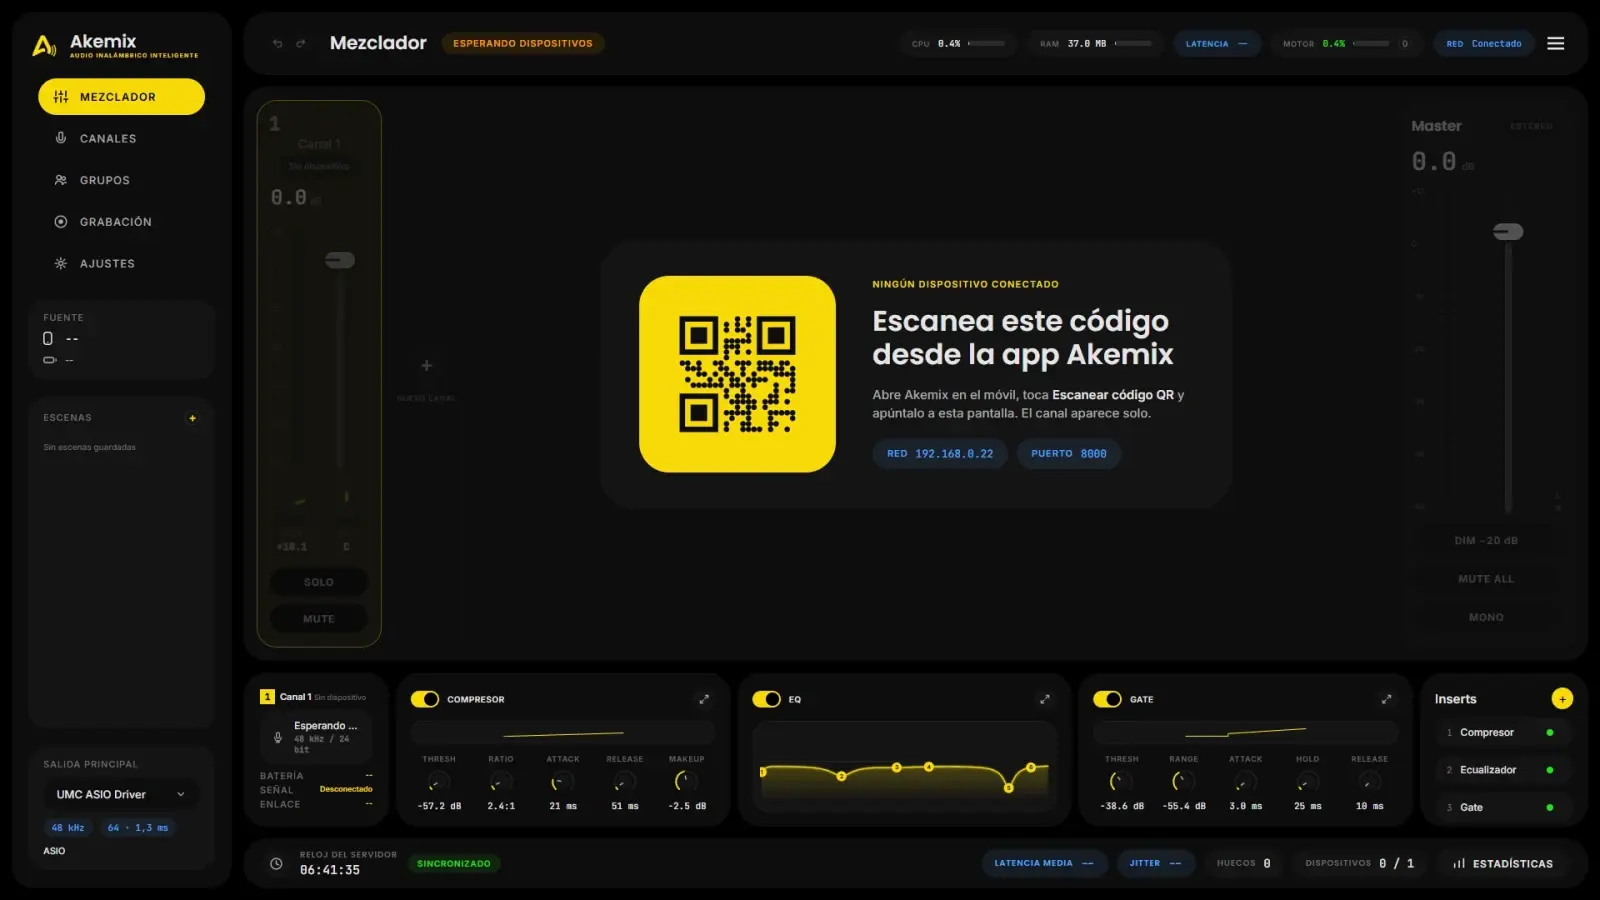
With an empty desk, the console shows a QR code. On the phone, open the app, tap “Scan QR code” and point it at the screen. The channel is created with the phone model as its name and you can rename it from the strip.
The console, panel by panel
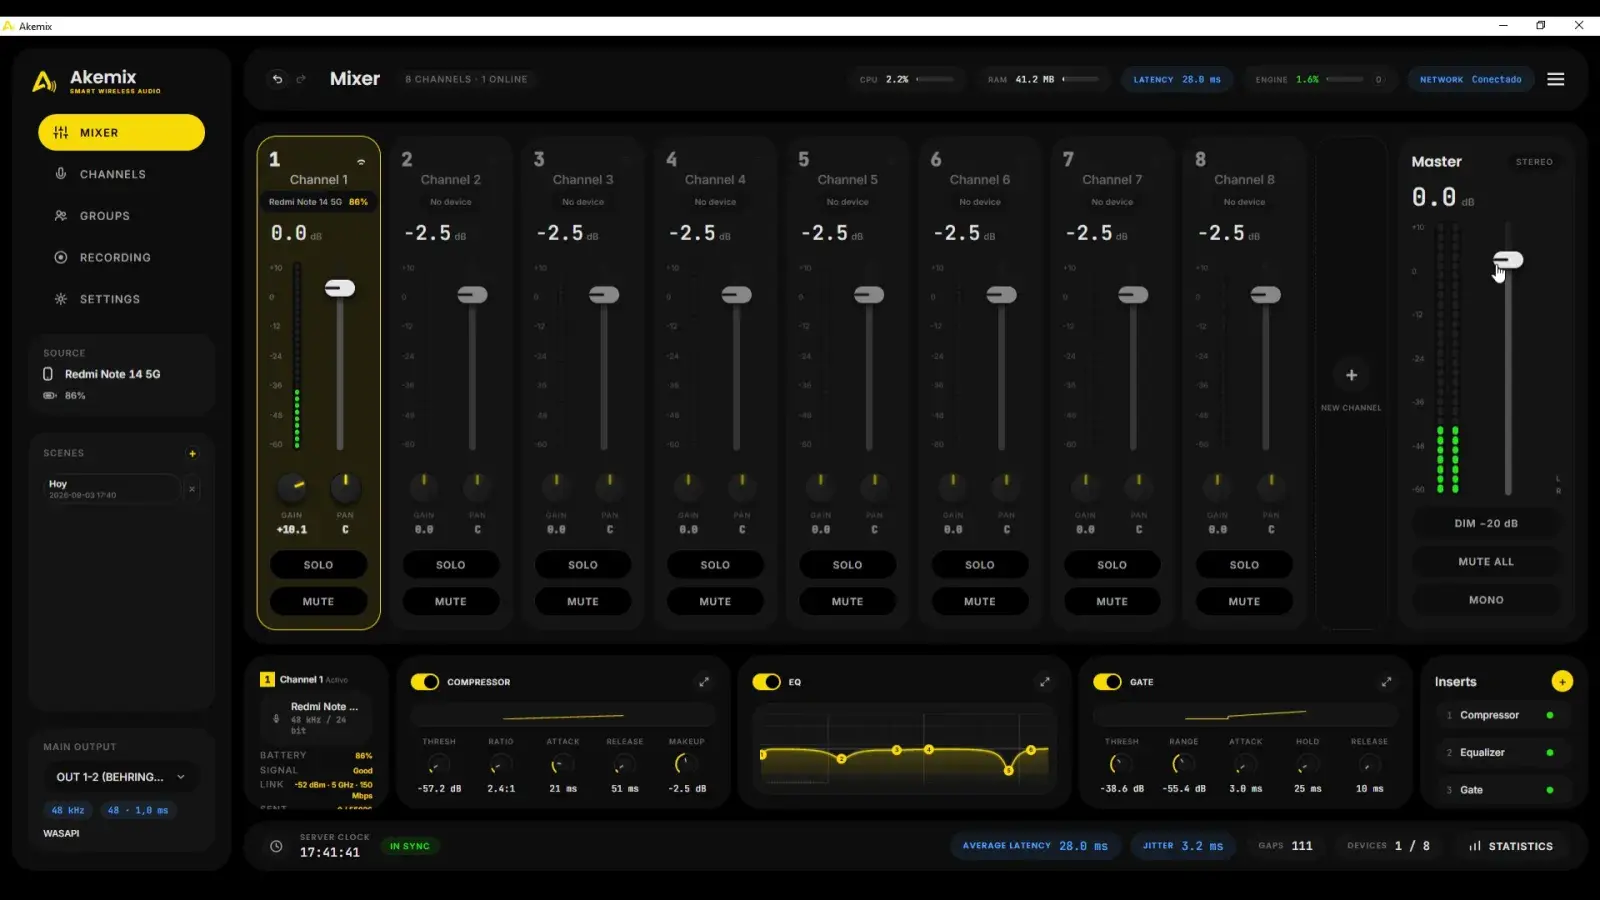
Everything happens in the browser, on a single screen. Here is what each area does.
Setting up the output
In the sidebar, under “Main output”, choose the interface. If an ASIO option shows up, use it: it gives the lowest latency. Raise the buffer until the dropout counter stays at zero.
Processing a channel
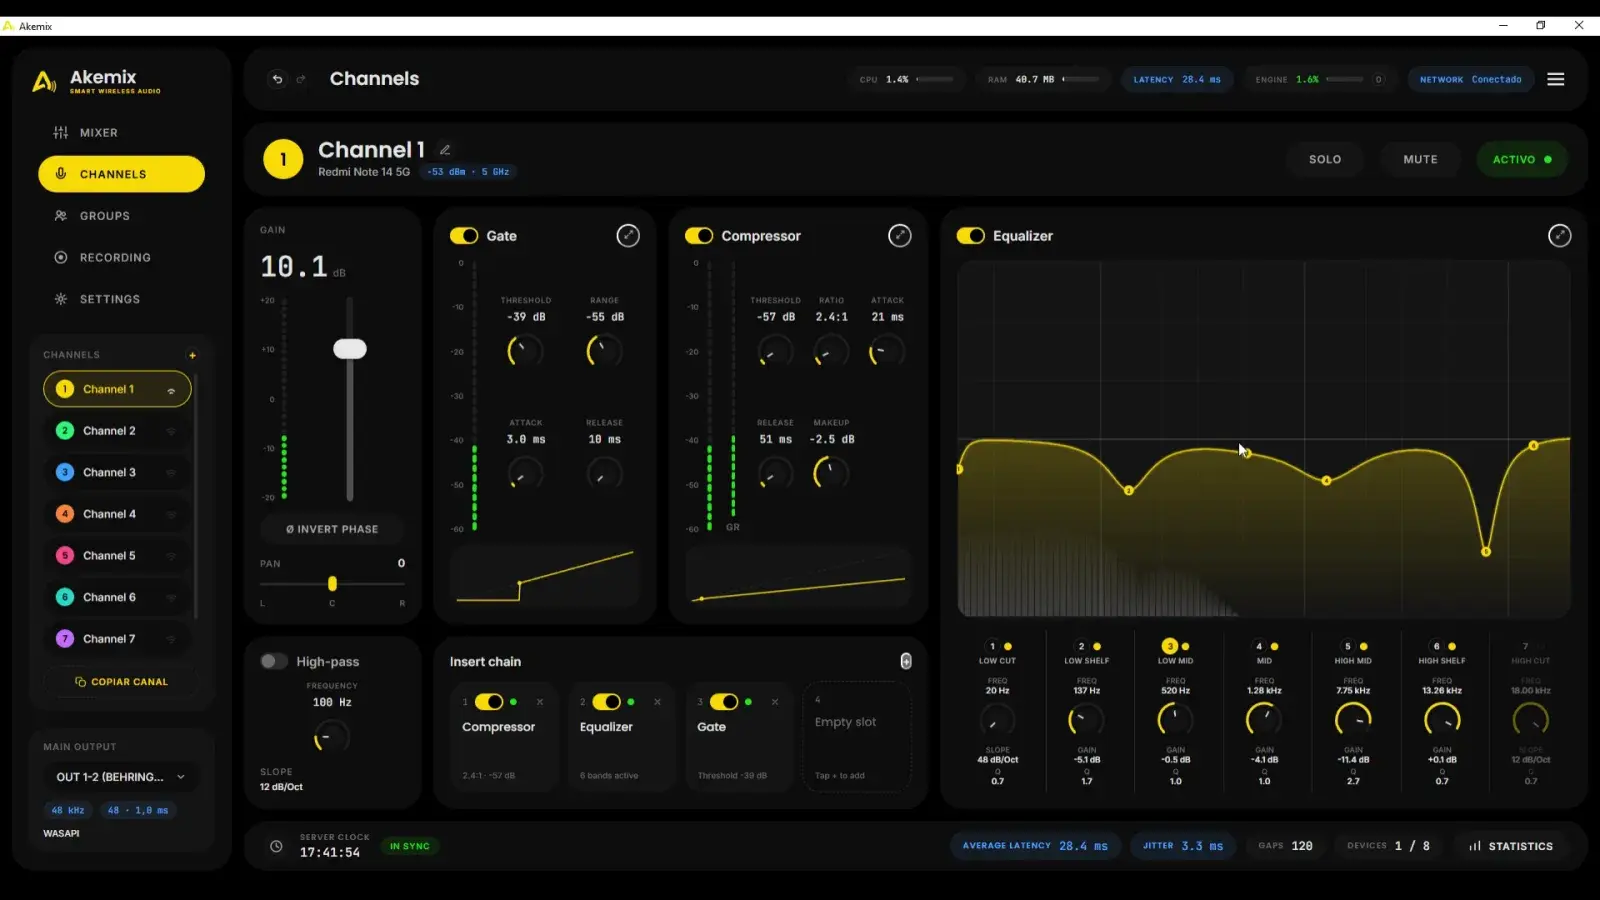
Select the strip and the gate, compressor and equaliser modules appear below. Each module expands to full screen with the expand icon, where you get the large curve and the input, reduction and output meters.
Start with the gate to clean up background noise, then compress, and leave the equaliser for last.
Groups and scenes
Under “Groups” you can assign several channels to a shared fader, handy for backing vocals or for a whole band.
Scenes store the full state of the desk: faders, pans, inserts, groups and output. They are recalled in one click from the sidebar and carry a name and a date.
Recording in multitrack
Under “Recording” you pick the format and the destination folder. Pressing the red button opens one file per channel plus the stereo mix. Recording is independent from processing: you can keep the tracks clean and apply the chain only to the mix.
Fixing network problems
The bottom bar shows average latency, jitter and the percentage of gaps. If jitter goes above 5 ms or gaps show up, check in this order:
- 01Move every device to the 5 GHz band and to the same access point as the PC.
- 02Turn off WiFi power saving on the phones: it is the most common cause of periodic gaps.
- 03Switch the codec from raw PCM to Opus to cut bandwidth to a quarter.
- 04Raise the output buffer one step and check whether the dropout counter goes back to zero.
Download the server and connect the first phone in five minutes
The free version includes four channels, 30 minutes of transmission a day, EQ and every network tool.